ColTapp’s GUI looks like this:
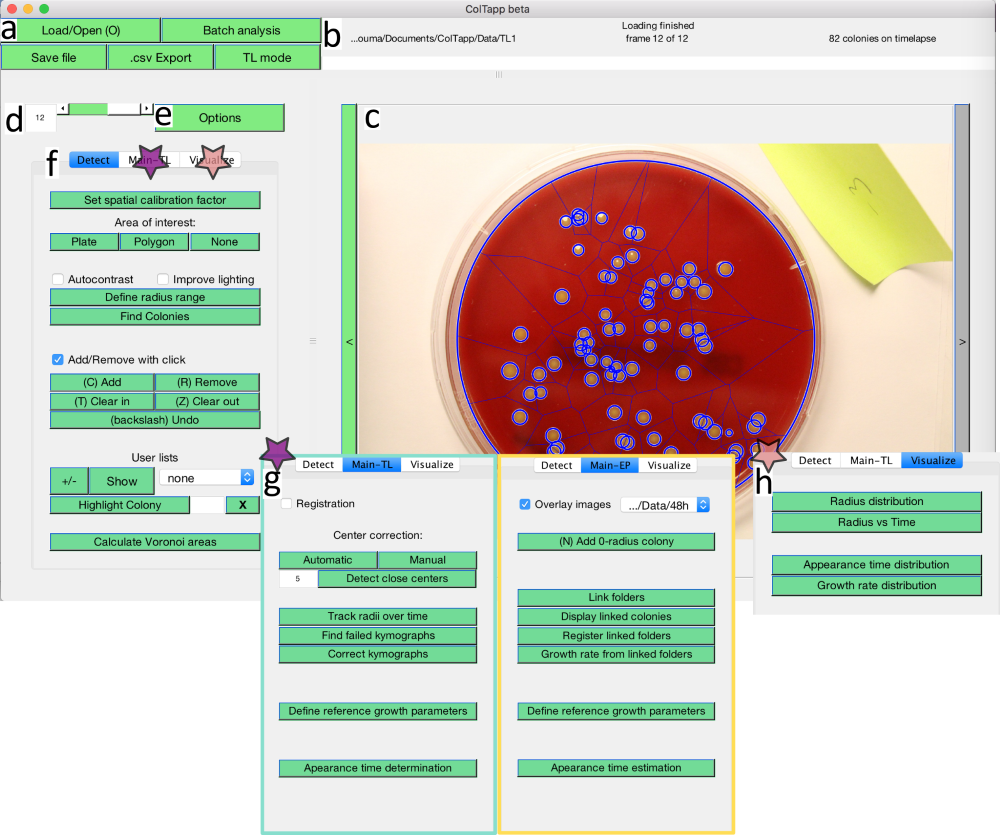
From the supplementary text of the manuscript. “Global operating buttons to load images and save data are in the top left part of the graphical interface (Fig. S1 a) and information about currently operating functions and text feedback in the top right part (Fig. S1 b). Upon loading a folder containing images to analyze, the user needs to define the operating mode (Time-lapse (TL) mode or Endpoint (EP) mode), which cannot be changed for further analysis. Images in a folder are sorted with a natural sorting algorithm by name and assigned a frame number (from 1 to number of images in the folder). The currently active frame is visible at the center of the graphical user interface (Fig. S1 c). The user can switch between frames by moving the slider, typing the number of the desired frame (Fig. S1 d), navigating with the buttons on the sides of the image or pressing left/right arrow keys. The user can choose to display available data on the current frame in the Options menu, which also contains additional parameter configuration and gives access to other functorialities (Fig. S1 e). The main functionalities of ColTapp are grouped in three tabs on the left of the interface: Detect, Main and Visualize (Fig. S1, f g and h respectively). Two versions of the main panel are shown (Fig. S1 g) because the panel is dynamically adapted depending on the mode chosen by the user (Main-TL, Main-EP).”